Late one Sunday afternoon in late March, I found myself kneeling in the damp North Carolina red clay, surrounded by a dozen plastic nursery pots and a bag of soil that had split open like a burst seam. I was trying to repot some hydrangeas on the back of my truck tailgate, and as a scoop of dirt slid off the metal and into my shoes, I realized my 'outdoor hobby' was actually just a growing pile of clutter.
Living on a half-acre fixer-upper means we have plenty of space, but absolutely zero systems. After the storage shed and the chicken coop, we knew we needed a dedicated potting station—something that wouldn't rot in the relentless southern humidity or bankrupt us on contractor fees. But here’s the kicker: we also had to keep our local HOA in mind. Even out here in the rural parts, some neighborhoods are picky about permanent structures, and we needed something that felt like a solid piece of furniture rather than an anchored addition to the house.
Quick heads up—this story contains affiliate links. If you decide to grab some plans through them, we earn a commission at no extra cost to you. We only recommend things like TedsWoodworking because these plans actually kept us from tearing our hair out in the backyard. We’ve used them on almost every project since the shed disaster of two years ago.
The "Napkin Plan" Failure
I’m the planner, and usually, that means I spend three nights sketching on the back of junk mail envelopes. I thought I could eyeball a potting bench. How hard could it be? Four legs, a top, and maybe a shelf? But then I started thinking about the weight of wet soil and the fact that our yard has more slopes than a ski resort. My sketches looked like something a toddler would build with popsicle sticks.
We’ve learned the hard way—specifically during our 7 biggest DIY failures in rural NC—that winging it leads to wasted lumber and a lot of swearing. I remember assuming I could eyeball the shelf height on a previous project and ending up with a lopsided surface that sent my favorite terra cotta pot sliding into the dirt. I wasn’t about to do that again with expensive cedar.
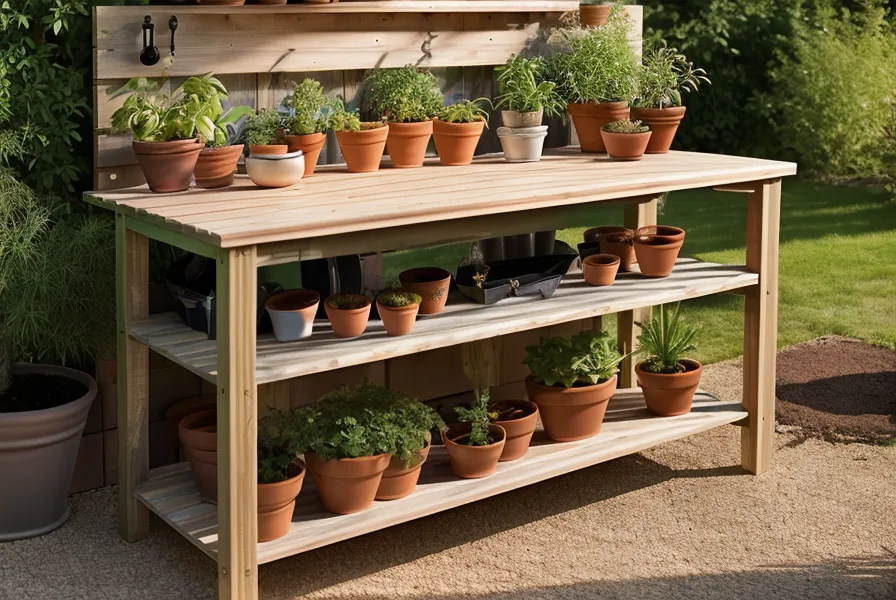
That’s when we turned back to the digital library we bought last year. If you’ve been around our blog for a bit, you know we’re obsessed with having a massive database of blueprints. Having access to a library of 16,000 plans means you don't just find 'a' potting bench; you find the *exact* one that fits your height and storage needs. For me, that meant finding a design with an ergonomic bench height of 36 inches—the industry standard for standing workstations so your lower back doesn't give out by the third seedling.
A Drizzly Saturday in April: The Build Begins
We waited for a break in the spring rains, but on a drizzly Saturday in April, we finally backed the truck up to the workshop and laid out the cedar. The smell of fresh-cut wood always gets us excited, but this time it was different. Because we were using professional plans, we had a detailed materials list. This is the secret sauce for DIY couples who want to stay married. No more three-trip Sundays to the hardware store because we forgot one box of screws.
Speaking of screws, here’s a tip we learned the hard way: North Carolina humidity is a beast. If you're building outdoors, you have to use ACQ-rated screws. Regular screws will corrode faster than you can say 'garden party' because of the chemicals in pressure-treated wood. We opted for cedar for the main body because it’s naturally rot-resistant, but we still used the heavy-duty fasteners to be safe.
The build became that familiar dance of blurring roles. I usually handle the planning, but I ended up running the miter saw for the frame while he triple-checked the foundation levels. Since our half-acre lot is mostly clay, we couldn't just plop the bench on the grass. We dug out a small area and laid a level gravel base. This is crucial—without it, the bench would sink into the clay and become a permanent, crooked part of the landscape within a month.
The Renter and HOA Secret: Portability
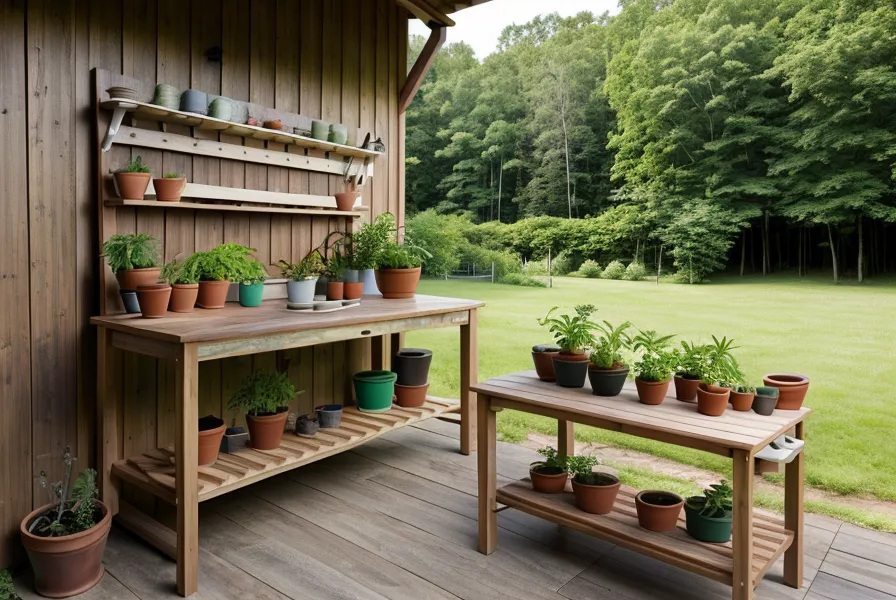
This is where our approach differs from the standard 'bolt it to the deck' advice. A lot of our friends are currently renting or living in HOAs with strict exterior modification rules. They think they can't have a workspace like this. But by using the plans from TedsWoodworking, we were able to modify the base to be entirely freestanding and sturdy enough to move if we ever decide to relocate the garden or (heaven forbid) sell the house.
The plans provided a blueprint for a heavy-duty lower shelf that acts as a structural brace. This makes the whole unit incredibly stable without needing to be anchored into the ground or the siding of the house. It’s essentially a massive, weather-proof piece of furniture. If you’re a renter, you can take this with you. If you’re in an HOA, it’s not a 'permanent structure'—it’s just a bench. It’s the ultimate loophole for people who want to build but have to follow the rules.
If you're looking for even bigger projects that might need more permits or specific county codes, we’ve also looked into My Shed Plans, which has about 12,000 shed designs. They are great for when you need to understand the structural side of things, but for this potting bench, the versatility of the general woodworking library was perfect.
Finishing Touches and Tingly Palms
By the first weekend of May, we were in the home stretch. This is the part of the project that usually feels like it takes forever, even though the heavy lifting is done. We spent hours sanding down the rough edges of the cedar. I can still feel the rhythmic, dull vibration of the orbital sander leaving my palms tingling long after we had finally called it a night. It’s a weird sensation, like your hands are still working even when you’re holding a cold beer.
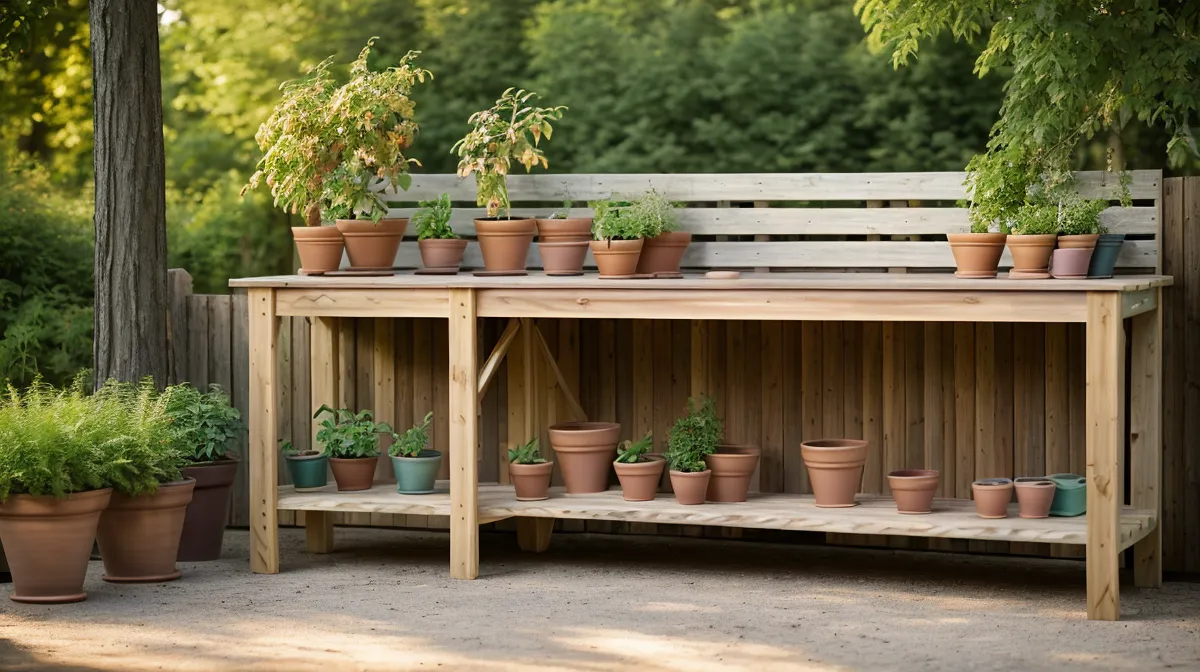
But man, the result was worth it. We stood back as the sun dipped low, taking in the sharp, clean scent of fresh-cut cedar mixing with the humid, pine-heavy air of our rural backyard. The bench has a recessed area for a soil bin, hooks for my trowels, and enough storage for all those plastic pots that used to live in a pile by the back door.
We’ve realized that being 'stubborn' only gets you so far in the DIY world. We used to think that using plans was somehow 'cheating' or that we weren't real builders if we didn't figure it out ourselves. But after our experience why we stopped winging it, we know better. Good plans are what actually finish the job. They take the guesswork out of the math—which, let’s be honest, is usually where we fail—and let us focus on the actual building.
Is It Worth the Effort?
Mid-afternoon last Tuesday, I was out there actually using the bench for the first time. The humidity was already starting to climb, but having everything at that 36-inch height made the work so much faster. I wasn't hunched over a tailgate or kneeling in the dirt. Everything had a place. If you're tired of the backyard clutter and want a project that you can actually finish in a couple of weekends, this is it.
If you're just starting your homesteading journey and want to build things that actually produce food or save money—like coops or root cellars—you might also want to check out the Self Sufficient Backyard guide. It’s less about blueprints and more about the whole ecosystem of the yard, which has been a great companion to our build plans.
Don't let the fear of measuring wrong keep you from building. We still don't always measure twice, and we still make mistakes, but having a solid set of plans means those mistakes are small hiccups instead of project-ending disasters. Grab yourself a set of real woodworking plans and just start. Your back (and your HOA) will thank you.