We were standing ankle-deep in North Carolina red clay last November, watching a contractor’s truck kick up dust as he drove away from our fixer-upper. He’d just handed us a quote for $18,500 to build a basic storage shed and a small deck. We looked at each other, then at our half-acre of weeds and mosquito breeding grounds, and realized our 'mini-farm' dream was dead before the first seed was even planted.
Quick heads-up—this post contains affiliate links. If you decide to buy through them, I earn a commission at no extra cost to you. We only recommend the plans and tools we have actually used on our own projects here in rural NC. Honestly, these are the only things that kept us from accidentally building a very expensive pile of firewood.
The $18,500 Reality Check
She: “I remember thinking, ‘Okay, so we just won’t have a backyard.’ $18,500? That’s a used truck. That’s a year of groceries. We bought this place to save money, not to hand it all over to someone else just to have a place to put the lawnmower. It felt like the house was winning and we were losing.”
He: “I’m not a builder. I’m a guy who owns a drill and knows how to search YouTube. But looking at that quote, I figured I could fail three times, buy all the tools twice, and still come out ahead. So, we told the contractor ‘no thanks’ and headed to the hardware store. It was the most terrifying and best decision we’ve made since moving to the rural side of North Carolina.”
Our goal wasn't just to have a place to sit; we wanted a productive yard. We wanted chickens for eggs, a garden for veggies, and a workshop that didn't involve me tripping over the weed-wacker every time I needed a screwdriver. But doing it on a budget meant we had to stop guessing and start following actual plans.

Phase 1: The Three-Weekend Shed
By late last November, we finally finished the 'three-weekend' storage shed. I say 'three-weekend' because that’s what the plan promised, and it actually worked—mostly because we stopped trying to wing the measurements. Why We Stopped Winging It: The Woodworking Plans That Changed Our Backyard Forever was a lesson learned the hard way after we spent the first Saturday just arguing about where the level went.
She: “The shed was the turning point. It gave us a place to keep the tools dry. Before that, we were hauling miter saws in and out of the kitchen. Do you know how hard it is to get sawdust out of a toaster? Don't ask. It’s a texture you never get used to.”
He: “The secret was actually having a cut list. I used to go to the store, buy 'some' 2x4s, and then go back three times because I was short. Using a specialist guide like My Shed Plans really helped with the foundation and permit side of things, which is a headache in our county. It gave us the confidence to stop being 'clueless homeowners' and start being 'people who own a framing hammer and aren't afraid to use it.'”
Phase 2: Chickens and the Great Fence Caper
Once the tools had a home, it was time for the residents. We wanted chickens. In North Carolina, if you don’t build a coop like Fort Knox, the raccoons and foxes will treat it like an all-you-can-eat buffet. Around mid-February—nothing says romance like building a nesting box—we finished the chicken coop and the perimeter fencing.

She: “I handled the planning for the garden layout and the coop placement. I wanted it close enough to the house to be convenient but far enough away that the... let’s call it 'farm aroma'... didn't drift into the bedroom. We used some resources from Self Sufficient Backyard to figure out how to integrate the coop with the garden beds. It’s not just about building stuff; it’s about making the yard work for you.”
He: “The fencing was the hardest part. Digging post holes in NC red clay is a special kind of purgatory. It’s like trying to drill through sun-dried brick. We broke one post-hole digger and my spirit roughly three times that week. But seeing the birds in there, safe and sound, made the blisters worth it. It also helped that we finally invested in the 10 Essential Power Tools for DIY Couples Who Hate Wasting Money, which made the framing go a lot faster.”
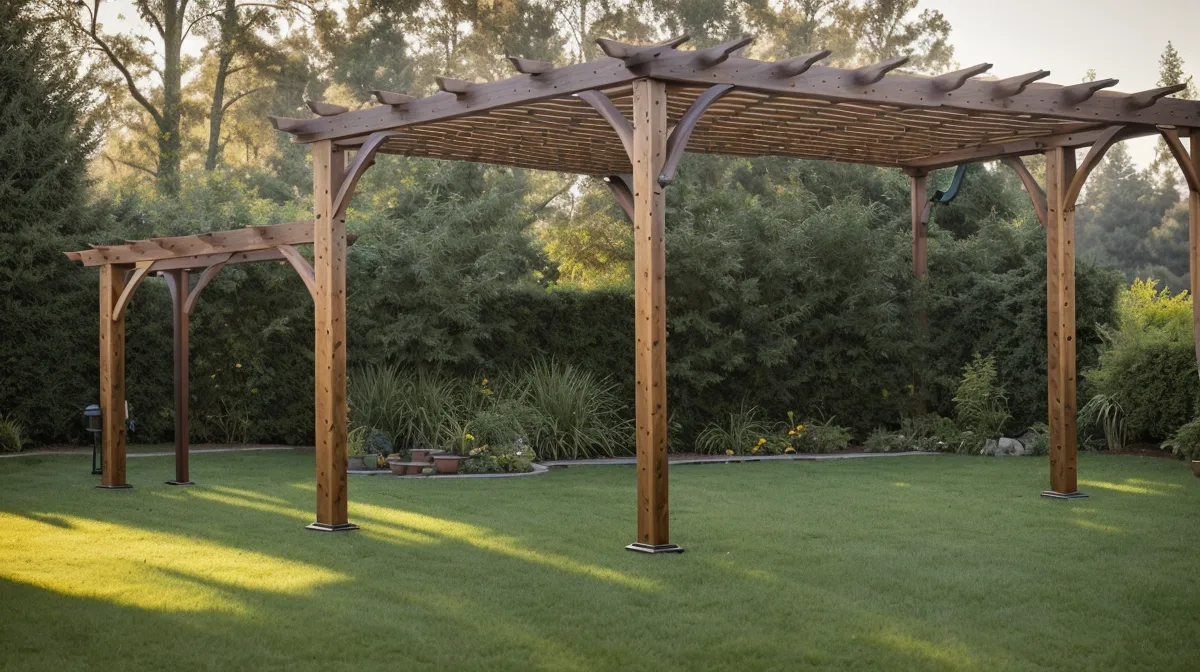
Phase 3: The Pergola and the Reward
By late March, we were finally ready for the 'pretty' part of the yard. We wanted a pergola—a place to sit and look at all the hard work while drinking a cold beer. But after the shed and the coop, my brain was fried. I couldn't handle another weekend of 'figuring it out' on the fly.
She: “This is where I stepped in and grabbed a massive library of blueprints. I was tired of him staring at a pile of lumber like it was a 3D puzzle with no instructions. We needed a plan that told us exactly what to do for the pergola frame.”
He: “I’ll admit it, I was skeptical. 16,000 plans? I thought it would be a mess. But the pergola plan was solid. It actually kept us from building what we now call the 'Leaning Tower of Lumber.' If you’ve seen Our First DIY Pergola Build: Surviving the 'Leaning Tower of Lumber' and Finishing It Right, you know we had some lessons to learn about gravity and support beams. Having a detailed cut list from TedsWoodworking saved us at least four trips to the lumber yard.”

The Budget Breakdown: Professional vs. DIY
- Contractor Quote (Shed & Basic Deck): $18,500
- Our Actual DIY Spend (Shed, Coop, Pergola, & Fencing): Approximately $3,200
- Total Savings: Over $15,000
That $15,000 stayed in our pockets. It paid for the chickens, the fruit trees, the raised bed soil, and a whole lot of pizza for the nights we were too tired to cook after building. Was it harder? Yes. Did I hit my thumb with a hammer more than once? Absolutely. But the yard is ours in a way it never would have been if we’d just written a check.
Our Advice for the Overwhelmed Homeowner
If you’re standing in your own mud pit right now, wondering where to start, here’s what we learned the hard way over the last six months:
1. Stop Winging It. We used to think plans were for people who didn't have 'vision.' Turns out, plans are for people who don't want to waste four hundred bucks on lumber that ends up as expensive firewood. Whether you use a massive library like TedsWoodworking for the big structures or a specific guide for your garden, follow the instructions. Your marriage will thank you.
2. Prepare for the Soil. If you’re in the South like us, you aren't digging in dirt; you’re digging in masonry. Rent the power auger. Just do it. Don't be the guy with the manual shovel crying in the clay. That guy was me. Don't be me.
3. The 'Three-Weekend' Rule. Everything takes longer than you think. If the plan says three weekends, it might take you four. If it says one day, clear your whole Saturday and Sunday. Building outside means you’re at the mercy of the rain, the heat, and the inevitable realization that you forgot to buy galvanized screws.
She: “And don't forget to celebrate the small stuff. The first egg we got from the coop felt like winning the lottery. The first time we sat under the pergola without it wobbling was a victory lap. We even managed to build a real firewood rack last month just to keep the yard looking sharp.”
He: “We aren't contractors. We aren't even particularly good at math. But we realized that if you have a decent set of plans and enough stubbornness to keep going when the red clay is sticking to your boots, you can build a whole lot more than you think. If you're ready to stop looking at quotes and start actually building, honestly, just grab a solid set of woodworking plans and start with something small. Before you know it, you’ll be the person the neighbors are watching from their windows, wondering how on earth you built a workshop by yourself on a Sunday afternoon.”